Using a welding machine can seem complex at first. But with guidance, it becomes simple and safe.
Welding machines are essential tools in many industries. They join metals together, creating strong, durable bonds. Learning to use a welding machine opens up a range of possibilities for repairs and projects. This guide will help you understand the basic steps and safety measures.
By the end, you’ll feel confident operating a welding machine. Safety gear is crucial; always wear gloves and a helmet. Proper setup and technique are key for effective welding. This introduction provides the foundation you need. Ready to start welding? Let’s dive in and explore the essential steps to using a welding machine effectively and safely.
Choosing The Right Welding Machine
Choosing the right welding machine is crucial for your welding projects. The correct machine will ensure efficient and high-quality work. It will also make the welding process safer and more manageable. Let’s explore the types of welding machines and the factors to consider when selecting one.
Types Of Welding Machines
There are several types of welding machines available. Each type has its specific uses and benefits. Here are the most common types:
MIG Welders: These machines use a wire electrode. They are perfect for beginners. MIG welders are good for thin metals and quick jobs.
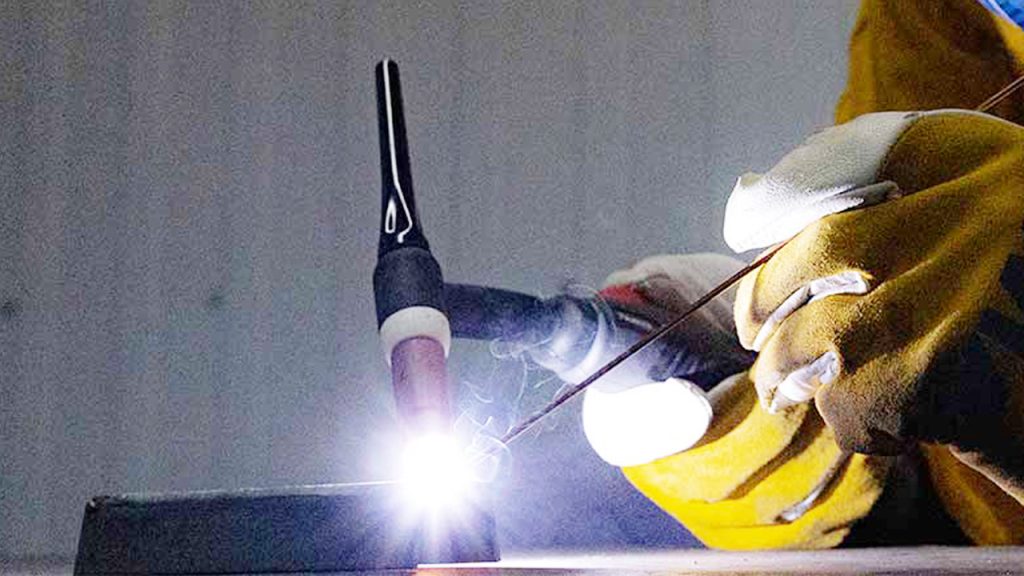
TIG Welders: These use a tungsten electrode. They are ideal for precise and clean welds. TIG welders work well with thinner metals.
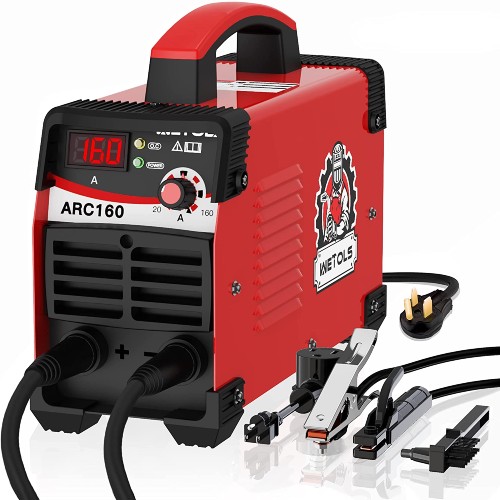
Stick Welders: These machines use a stick electrode. They are suitable for heavy-duty welding. Stick welders can handle thicker metals and work well outdoors.
Flux-Cored Welders: Similar to MIG welders, but they use a special wire. They work great for outdoor welding and thicker materials.
Factors To Consider
Several factors influence your choice of a welding machine. Here are some key considerations:
Material Type: Identify the material you will weld. Different machines work better with specific metals.
Thickness: Check the thickness of the material. Choose a machine that can handle the thickness efficiently.
Power Supply: Ensure the machine matches your power availability. Some machines require higher voltage levels.
Skill Level: Your experience level matters. Beginners should start with simpler machines.
Portability: Consider where you will use the machine. Portable machines are easier to move around.
Budget: Set a budget. Find a machine that offers good value for money within your range.
Safety Features: Look for machines with essential safety features. These features will protect you during the welding process.

Credit: www.cruxweld.com
Essential Safety Gear
Welding can be dangerous if proper safety measures are not followed. Wearing the right gear is crucial to protect yourself from hazards. Here’s a breakdown of the essential safety gear you need when using a welding machine.
Protective Clothing
Always wear flame-resistant clothing when welding. Cotton or wool is best since they don’t melt. Avoid synthetic fabrics, which can catch fire and melt. Wear long sleeves and pants to cover your skin. Special welding jackets offer better protection. Also, use welding gloves to protect your hands from sparks and heat.
Eye And Face Protection
Protect your eyes with a welding helmet. The helmet should have a proper shade filter for the type of welding you are doing. This protects your eyes from harmful light and sparks. A helmet with an auto-darkening filter can be more convenient. Safety glasses are also important. Wear them under your helmet for extra protection.
Respiratory Equipment
Welding can produce harmful fumes. Use a respirator to protect your lungs. Choose a respirator that is suitable for the type of welding you are doing. Make sure it fits well and is comfortable. For some types of welding, you may need a supplied-air respirator. Always work in a well-ventilated area to reduce exposure to fumes.
Preparing Your Workspace
Before you start welding, it’s essential to prepare your workspace properly. A well-prepared area ensures safety and efficiency. Let’s break it down step by step.
Ventilation And Lighting
Welding produces fumes and gases that are harmful if inhaled. Good ventilation is crucial. Open windows or use fans to keep the air moving. If you are working in a confined space, consider using an exhaust hood to draw fumes away.
Next, let’s talk about lighting. Welding requires precision, so adequate lighting is necessary. Natural light is great, but additional lights can help too. Use bright, focused lights to illuminate your work area. Trust me, the better you see, the better your welds will be!
Organizing Your Tools
Imagine you are in the middle of a weld, and you can’t find your chipping hammer. Frustrating, right? That’s why organizing your tools is vital. Here are a few tips:
- Tool Rack: Use a tool rack to keep your hammers, clamps, and other tools within reach.
- Table: A sturdy table gives you a stable surface to work on. Keep your tools on it for easy access.
- Storage: Use drawers or boxes to store smaller items like electrodes and nozzles.
By keeping your tools organized, you save time and reduce frustration. Plus, it’s much safer when everything has its place.
Remember, a tidy workspace isn’t just about aesthetics. It’s about efficiency and safety. So, take the time to set up your space correctly, and you’ll thank yourself later.
Setting Up The Welding Machine
Welcome to the exciting world of welding! Before you start creating sparks, it’s crucial to set up your welding machine correctly. This ensures your safety and helps you get the best results. Let’s dive into the essential steps of setting up your welding machine.
Machine Calibration
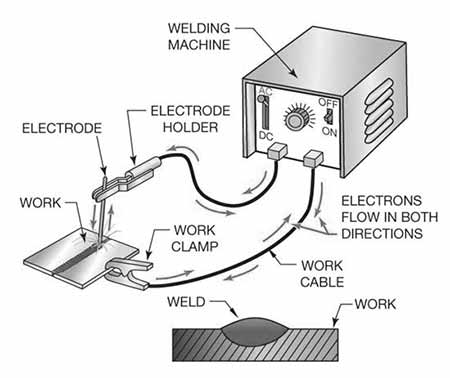
Calibration of your welding machine is like tuning a guitar; it needs to be just right. Start by reading the manual that comes with your machine. It contains specific instructions for your model.
Here’s a simple checklist to follow:
- Ensure the machine is off before you begin.
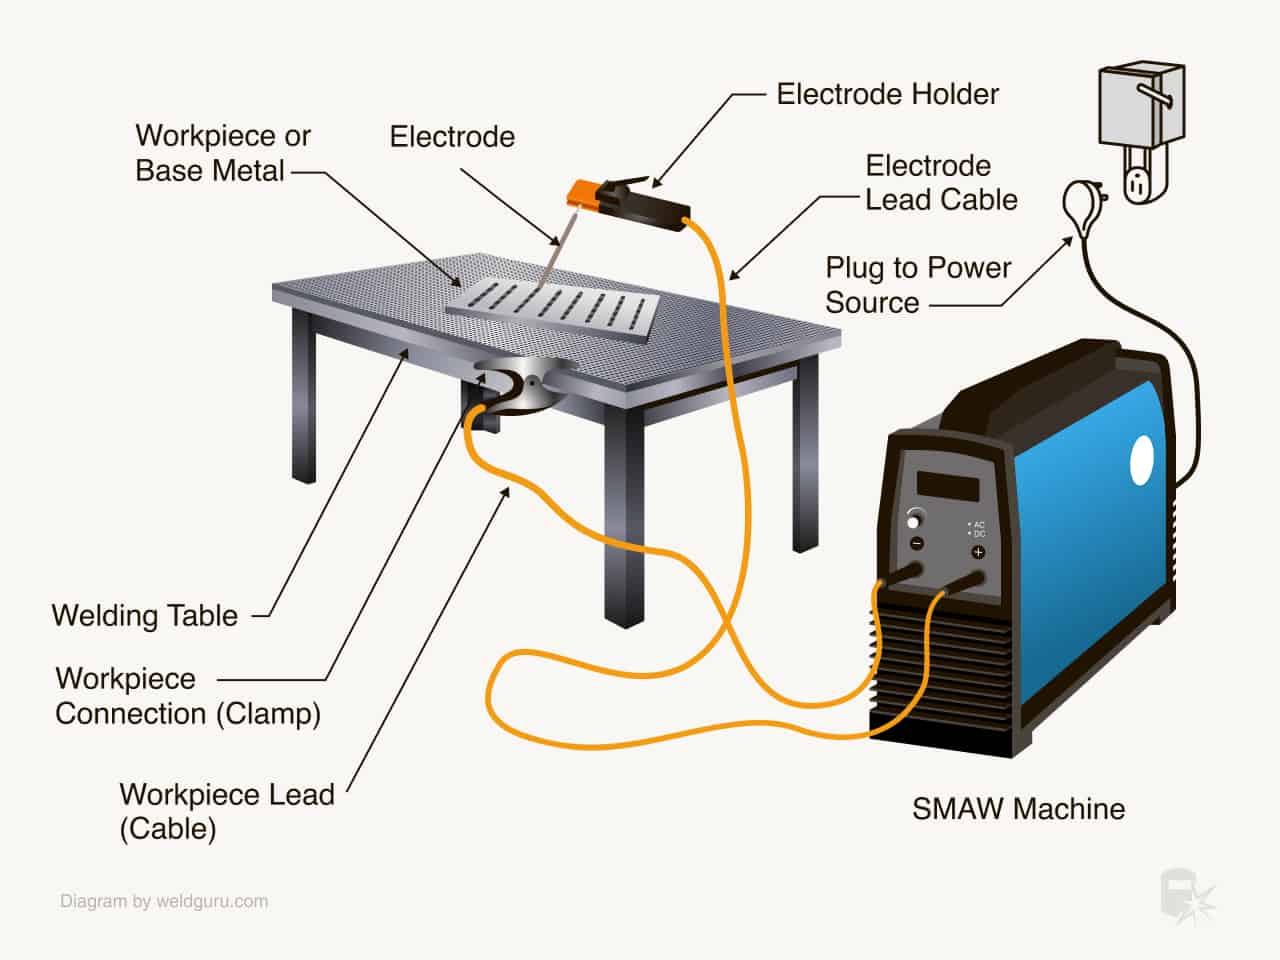
- Connect the machine to a power source.
- Adjust the voltage and amperage settings according to the material you’ll be welding.
- Use a test piece to make sure the settings are correct.
Remember, each material might need different settings. Practice makes perfect, so don’t be afraid to experiment a bit.
Choosing The Right Electrode
Choosing the right electrode is crucial. Think of it as picking the right tool for the job. Here’s a quick guide to help you:
| Material | Electrode Type |
|---|---|
| Steel | E6010 or E6011 |
| Stainless Steel | E308L |
| Cast Iron | Nickel-based |
Here’s a tip: always make sure your electrodes are dry. Moisture can cause poor welds and lots of frustration.
Got it? Good! Now, you’re ready to start welding like a pro. And remember, every expert was once a beginner, just like you.
Basic Welding Techniques
Learning to use a welding machine can seem daunting at first, but with some basic techniques, you’ll be on your way to creating strong, clean welds in no time. Whether you’re a novice or just need a refresher, understanding these foundational skills is crucial for successful welding. Let’s dive into two key techniques that every welder must master: striking the arc and maintaining a steady hand.
Strike The Arc
Striking the arc is the first step in welding, and it sets the stage for everything that follows. Think of it like lighting a match; you need to get it just right. Here’s how to do it:
- Prepare your work area: Ensure your workspace is clean and free of flammable materials.
- Set the machine: Adjust your welding machine to the correct settings for the material you are welding.
- Position the electrode: Hold the electrode at a slight angle, about 15 degrees from the vertical.
- Strike the arc: Tap the electrode against the metal surface quickly, like striking a match, to create a spark.
- Lift slightly: Once the arc is struck, lift the electrode slightly to maintain the arc without touching the metal.
It might take a few tries to get the hang of striking the arc, but don’t worry. Practice makes perfect!
Maintaining A Steady Hand
Once you’ve struck the arc, keeping a steady hand is essential for a clean weld. If your hand wavers, so will the weld, leading to weak spots and a messy finish. Here are some tips to help you maintain stability:
- Use both hands: Whenever possible, use your non-dominant hand to support your welding hand.
- Rest your elbow: Resting your elbow on a stable surface can significantly reduce hand movement.
- Move smoothly: Keep a consistent speed as you move the electrode along the joint.
- Watch the puddle: Focus on the molten metal puddle to guide your weld, ensuring a uniform bead.
Imagine you’re drawing a straight line with a pen. The steadier your hand, the straighter the line – the same principle applies to welding.
With these basic techniques in your toolkit, you’re well on your way to mastering the art of welding. Remember, patience and practice are your best friends on this journey. Happy welding!
Common Welding Mistakes
Welding is an art. It’s not just about melting metal. To become a good welder, you need to avoid common mistakes. These mistakes can make your welds weak and ugly. Let’s look at two common mistakes: overheating and slag inclusions.
Avoiding Overheating
Overheating is a frequent mistake, especially for beginners. Too much heat can burn through the metal. This makes the weld weak.
But how can you avoid overheating? Here are some tips:
- Control your speed: Move the welding torch at a steady pace. Don’t rush.
- Adjust the settings: Set the machine to the right power level. Each metal has a different requirement.
- Practice: Welding is a skill. The more you practice, the better you get.
Remember, practice makes perfect. Keep trying and you will improve.
Preventing Slag Inclusions
Slag inclusions are another common problem. Slag is the residue left after welding. If it gets trapped in the weld, it weakens the joint.
Here’s how to prevent slag inclusions:
- Clean the weld area: Dirt and rust can cause slag. Clean the metal before welding.
- Use the right technique: Keep the angle of the welding torch correct. This helps to push the slag out.
- Chip away the slag: After welding, use a chipping hammer to remove the slag. Don’t skip this step.
Avoiding these mistakes will make your welds stronger and cleaner. Happy welding!
Have you ever made these mistakes? Share your experiences in the comments below. Let’s learn together!
Post-welding Procedures
After completing your welding project, post-welding procedures are essential. These steps ensure the strength, durability, and appearance of your welds. Properly following these procedures will help you maintain your equipment and achieve the best results.
Inspecting Your Welds
First, carefully inspect your welds. Look for any visible defects like cracks or gaps. Ensure the welds are smooth and even. Use a magnifying glass for a closer inspection. Feel the welds with your fingers to detect any rough spots. If you find any issues, address them immediately.
Cleaning And Maintenance
Next, clean the welded area. Remove any slag, spatter, or debris. Use a wire brush or grinder for this task. Clean welds ensure better performance and appearance. Wipe down the surface with a clean cloth. This removes any remaining dust or particles.
Maintaining your welding machine is crucial too. Check all components for wear and tear. Replace any damaged parts. Keep your machine clean and store it in a dry place. Regular maintenance extends the lifespan of your equipment.

Credit: productiva.tv
Advanced Welding Tips
Welding is a valuable skill that requires practice and patience. For those who have mastered the basics, there are advanced techniques to explore. These advanced tips can help improve your weld quality and efficiency.
Welding Different Metals
Different metals require different techniques. For instance, welding aluminum differs from welding steel. Aluminum needs more heat and faster travel speed. Steel is more forgiving but still requires precision. Always adjust your settings for the metal you are welding. Use the correct filler material for each type of metal.
Some metals are more reactive. Stainless steel, for example, needs a specific gas mix. Otherwise, the weld may corrode. Copper conducts heat quickly. So, preheat it to avoid cracking. Practice on scrap pieces to find the best settings for each metal.
Mastering Different Positions
Welding in different positions can be challenging. Each position requires a unique technique. Flat welding is the easiest. Gravity helps the molten pool stay in place. For horizontal welding, keep the gun at a slight angle. This helps the weld pool stay stable.
Vertical welding is trickier. Use a weaving motion to control the heat. Move the gun upwards in small circles. Overhead welding requires even more control. Keep the gun close to the workpiece. This prevents the molten pool from dripping.
Practice each position to improve your skills. Start with easier positions and move to harder ones. Take your time and be patient. Each position has its own challenges. Overcome them with practice and persistence.

Credit: www.nu-tech.us
Frequently Asked Questions
How Do You Use A Welding Machine?
To use a welding machine, first wear safety gear. Set the machine to the correct settings. Secure the materials. Strike an arc with the electrode. Move steadily along the joint to weld.
What Is The Easiest Way To Weld For Beginners?
The easiest way to weld for beginners is using MIG welding. It’s user-friendly and ideal for learning basics. Ensure proper safety gear and practice consistently for best results.
How To Set Up A Welding Machine Step By Step For Beginners?
1. Read the welding machine manual carefully. 2. Ensure proper grounding of the machine. 3. Connect the electrode holder and ground clamp. 4. Set the correct amperage based on material thickness. 5. Wear appropriate safety gear before starting.
How Does Welding Work Step By Step?
Welding works by heating metals to their melting point. A filler material is added to join the metals. The molten metal cools and solidifies, creating a strong joint. Different welding methods include MIG, TIG, and stick welding. Proper safety gear and techniques are essential for effective welding.
Conclusion
Learning to use a welding machine can be straightforward with practice. Safety comes first, so always wear protective gear. Start with small projects to build your confidence. Follow the machine’s guidelines carefully. This ensures better results and reduces risks. Regular maintenance of your welding machine is essential.
Happy welding!

